This post will show you the basics of working with Cloudflare Workers and KV.
-
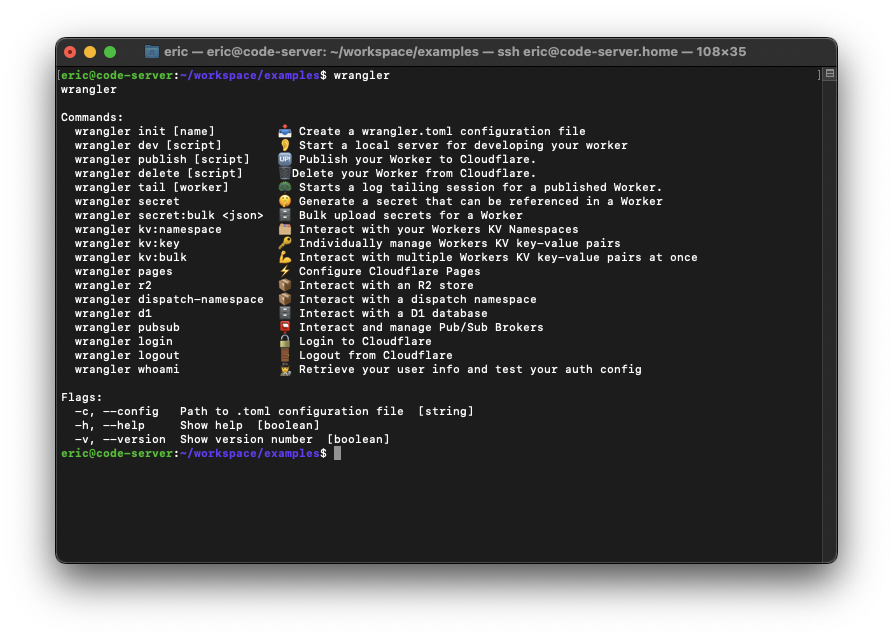
View available Wrangler commands by running
wrangler.![image]()
-
Create a new project using
wrangler init myworkerand follow the prompts. For this example, I’m using Typescript.![image]()
- The init command has created a new project folder called myworker in your current directory. Within the myworker directory there will be the following files and directories:
- node_modules/ – The location where external modules are installed for your project.
- package-lock.json – Automatically generated file that describes the exact tree that was generated to allow subsequent installs to have the identical tree.
- package.json – Records important metadata about the project which is required before publishing to NPM, and also defines functional attributes of a project that npm uses to install dependencies, run scripts, and identify the entry point to our package.
- src/ – The directory containing the project source code. The template will create a single file called index.ts.
- tsconfig.json – Specifies the root files and the compiler options required to compile the project.
- wrangler.toml – Configuration file to customise the development and publishing of a Cloudflare worker.
-
Optional - create a .gitignore file at the root of the myworker directory with
node_modules/as the content. This will exclude the node_modules directory from being tracked by Git. -
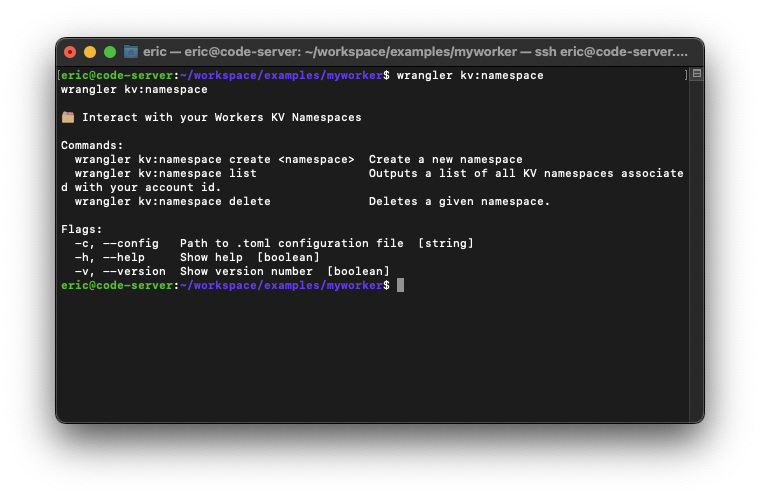
Create a KV Namespace for the project. You can create KV Namespaces from the Cloudflare Dashboard or via CLI using wrangler. Running the
wrangler kv:namespacecommand will display the available commands for kv:namespace,![image]()
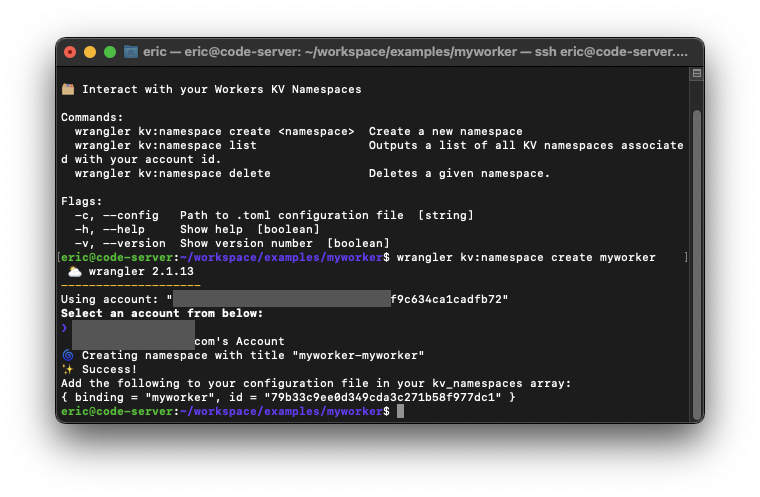
- Create a new namespace using
wrangler kv:namespace create myworker.Note: Steps 6-8 can be done using the Cloudflare dashboard dashboard > Account Home > Workers > KV. The newly created namespace will be called <project>-<namespace>.
![image]()
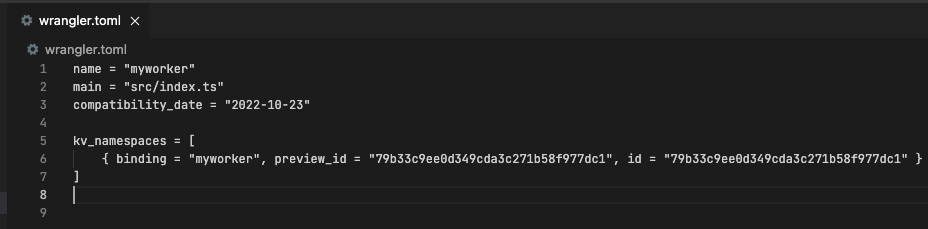
- Add the bindings to wrangler.toml. Bindings allow your Workers to interact with resources (D1, R2, KV) on the Workers platform. Bindings can be configured by logging in to the Cloudflare dashboard > Account Home > Workers > your Worker > Settings Variables.
Note: –preview_id is being used so that the dev server is using the same KV Namespace as the production Worker.
![image]()
-
Create a key value pair using the
wrangler kv:key put mykey myvalue --binding myworker --previewcommand.![image]()
- Optional - Example commands
- PUT -
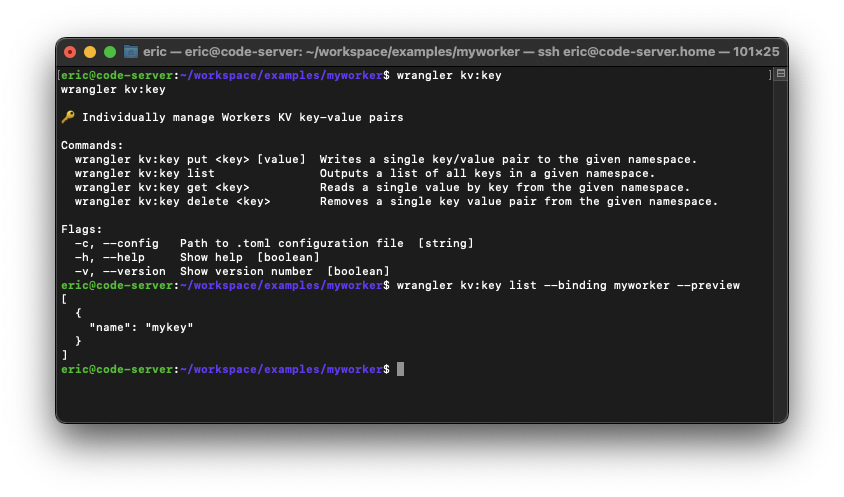
wrangler kv:key put mykey updatedvalue --binding myworker --preview - LIST -
wrangler kv:key list --binding myworker --preview - GET -
wrangler kv:key get mykey --binding myworker --preview - DELETE -
wrangler kv:key delete mykey --binding myworker --preview![image]()
- PUT -
-
Use your preferred code editor and modify the ./src/index.ts file as per below.
1
2
3
4
5
6
7
8
9
10
11
12
13
14
15
16
17
18
19
20
21
22
23
24
25
26
27
28
29
30
/**
 * Welcome to Cloudflare Workers! This is your first worker.
 *
 * - Run `wrangler dev src/index.ts` in your terminal to start a development server
 * - Open a browser tab at http://localhost:8787/ to see your worker in action
 * - Run `wrangler publish src/index.ts --name my-worker` to publish your worker
 *
 * Learn more at https://developers.cloudflare.com/workers/
 */

export interface Env {
    // Example binding to KV. Learn more at https://developers.cloudflare.com/workers/runtime-apis/kv/
    // MY_KV_NAMESPACE: KVNamespace;
    myworker: KVNamespace;
    //
    // Example binding to Durable Object. Learn more at https://developers.cloudflare.com/workers/runtime-apis/durable-objects/
    // MY_DURABLE_OBJECT: DurableObjectNamespace;
    //
    // Example binding to R2. Learn more at https://developers.cloudflare.com/workers/runtime-apis/r2/
    // MY_BUCKET: R2Bucket;
}

export default {
    async fetch(request: Request, env: Env,	ctx: ExecutionContext): Promise<Response> {
        // Get the 'mykey' value from KV
        let myvalue = await env.myworker.get('mykey')

        return new Response("the value of mykey is " + await env.myworker.get('mykey'));
    },
};
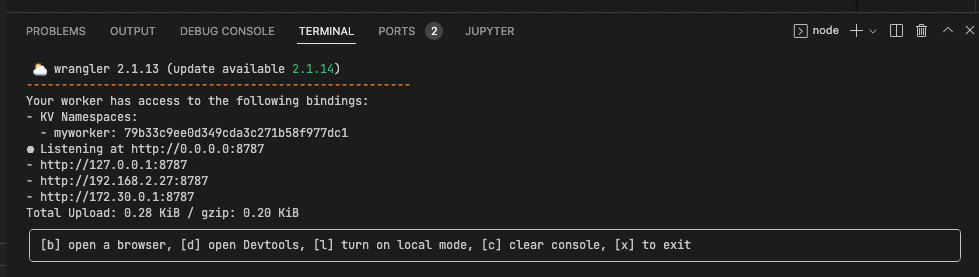
- Run a local development server using the
wrangler devcommand.Note: Use ‘x’ to stop the dev server and ‘b’ to open a browser window.
![image]()
- Optional - Publish the worker to your Cloudflare account using
wrangler publish.![image]()