This post will show you how to securely publish RDP using Cloudflare Zero Trust Access. RDP can be published using private subnet routing with Cloudflare WARP to Tunnel and/or public hostname routing using cloudflared access. This post uses public hostname routing.
-
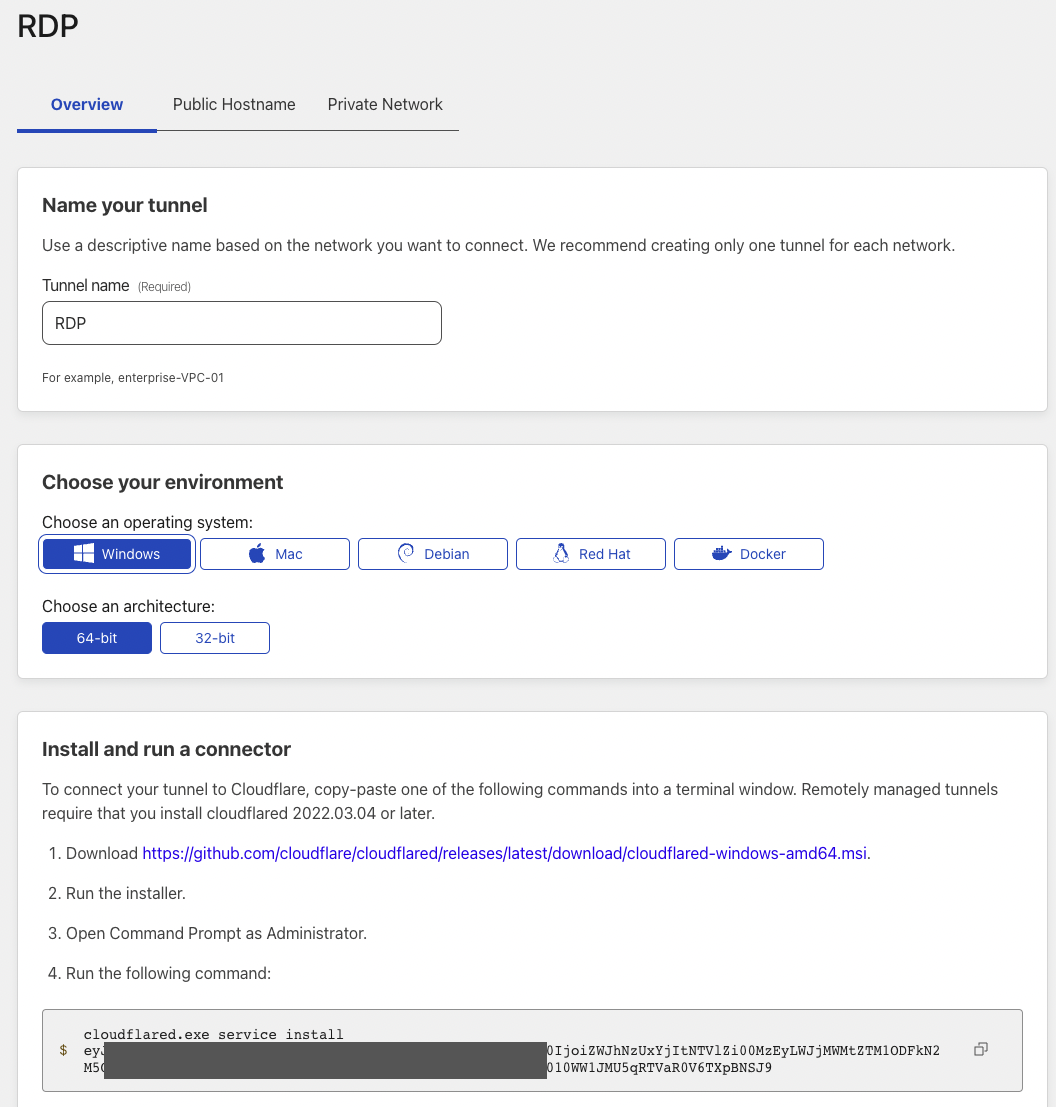
Create the Cloudflare Tunnel. Navigate to dashboard > Account Home > Zero Trust > Access > Tunnels > Create a Tunnel. Download and install cloudflared on the RDP host following the Install and run a connector instructions.
![image]() Once cloudflared is installed, you should see an active tunnel for your host in Zero Trust > Access > Tunnels as shown below.
Once cloudflared is installed, you should see an active tunnel for your host in Zero Trust > Access > Tunnels as shown below.
![image]()
-
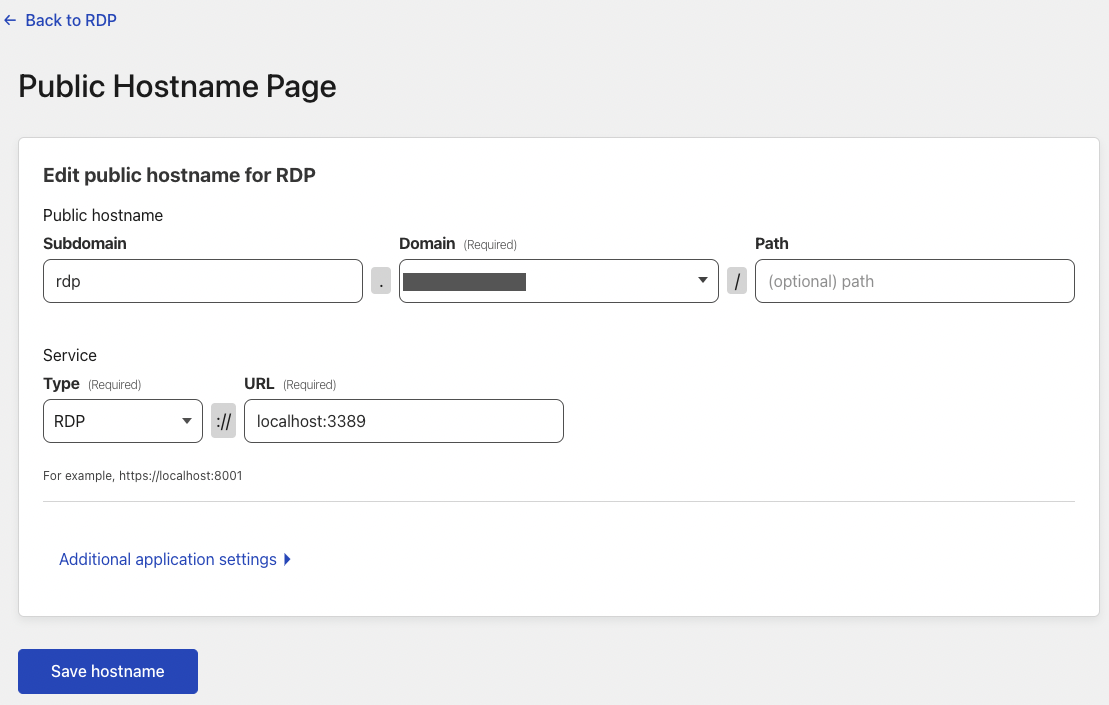
Create the public hostname. Navigate to Zero Trust > Access > Tunnels > Your Tunnel > Public Hostname. Enter a suitable Subdomain for the RDP host and select your Domain. Type will be RDP and the URL will be localhost:3389.
![image]()
-
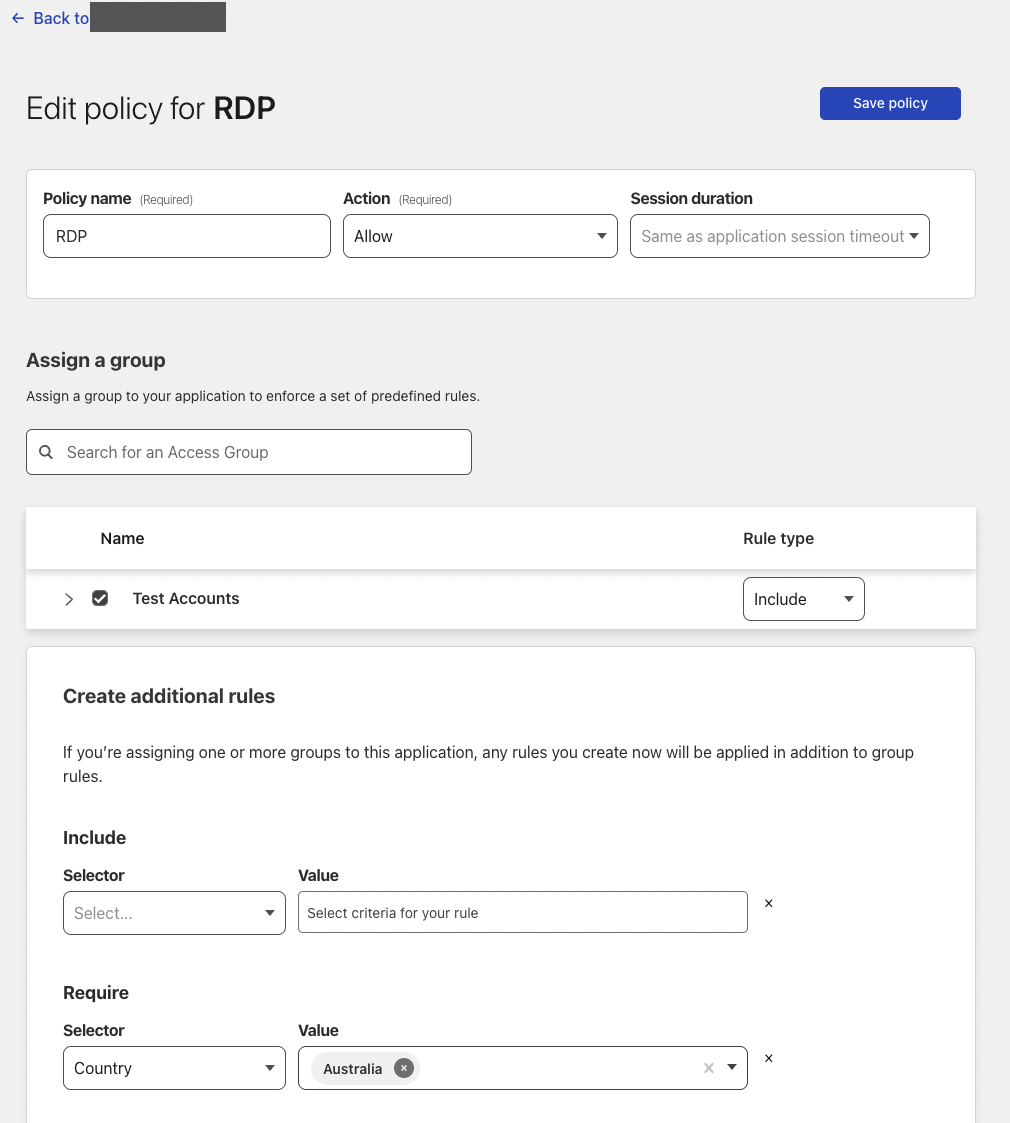
Add an application policy. Navigate to Zero Trust > Access > Applications > Add an application. Give the policy a suitable name and assign users using the Include selector. Optional - you can choose to add appropriate Require fields. In this example, only connections from Australia will be allowed.
![image]()
-
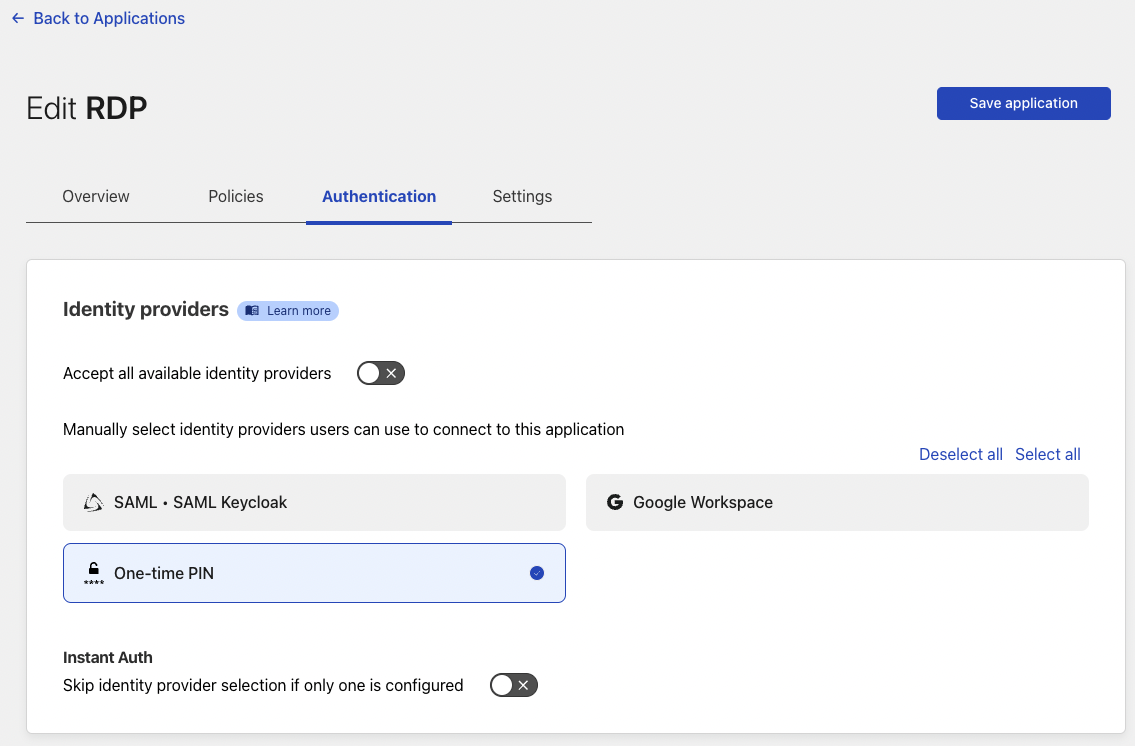
Configure authentication using your preferred/configured options. In this case, One-time PIN will be used.
![image]()
-
Configure the RDP client. The PC name or Hostname should be pointing to localhost:3389. All other settings can be configured as normal.
![image]()
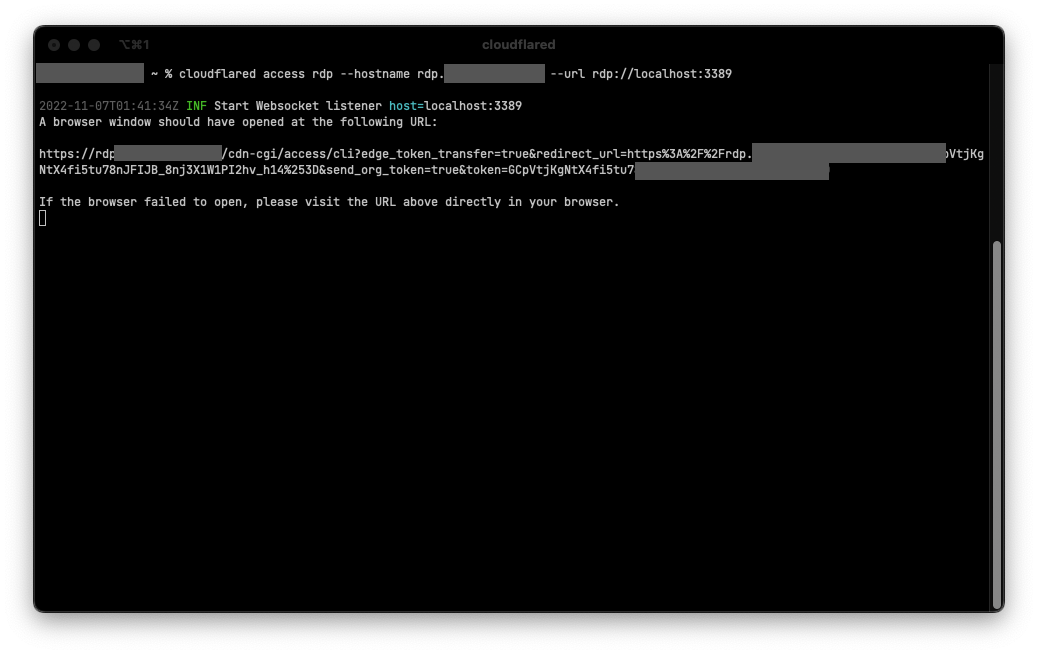
- Start cloudflared on the client computer (the one making the RDP connection) using the command
cloudflared access rdp --hostname rdp.yourdomain --url rdp://localhost:3389. If cloudflared is not installed, follow these instructions install cloudflared.Note: Cloudflared will need to be running in order to make RDP connections.
![image]()
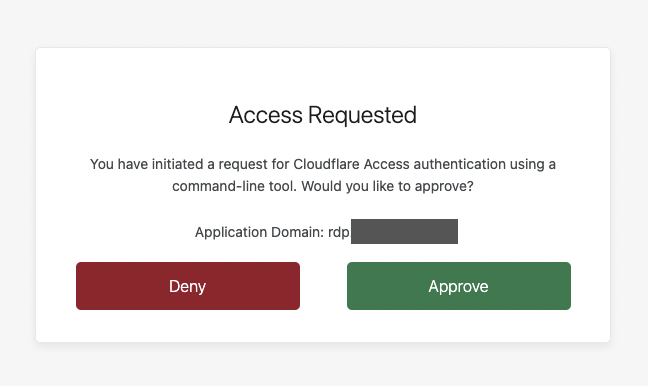
- Once the RDP client is opened and you attempt to connect to the host, you should see a browser window open requesting that you login to Cloudflare Access. Login using your account specified in Step 4. Once authenticated, you will be prompted to Approve or Deny access. Select Approve.
![image]()
![image]()
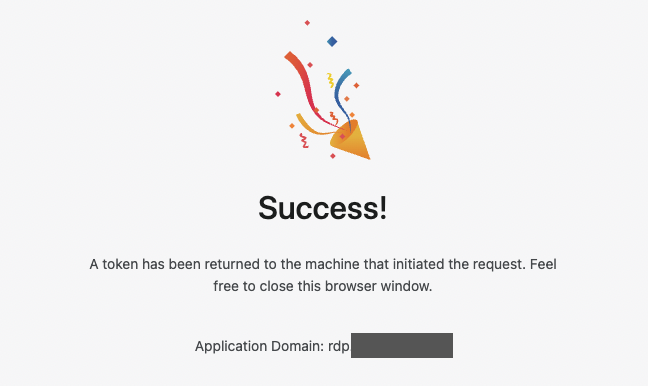
Note: If a broswer window does not open automatically you can click or copy and paste the URL from console.
![image]()
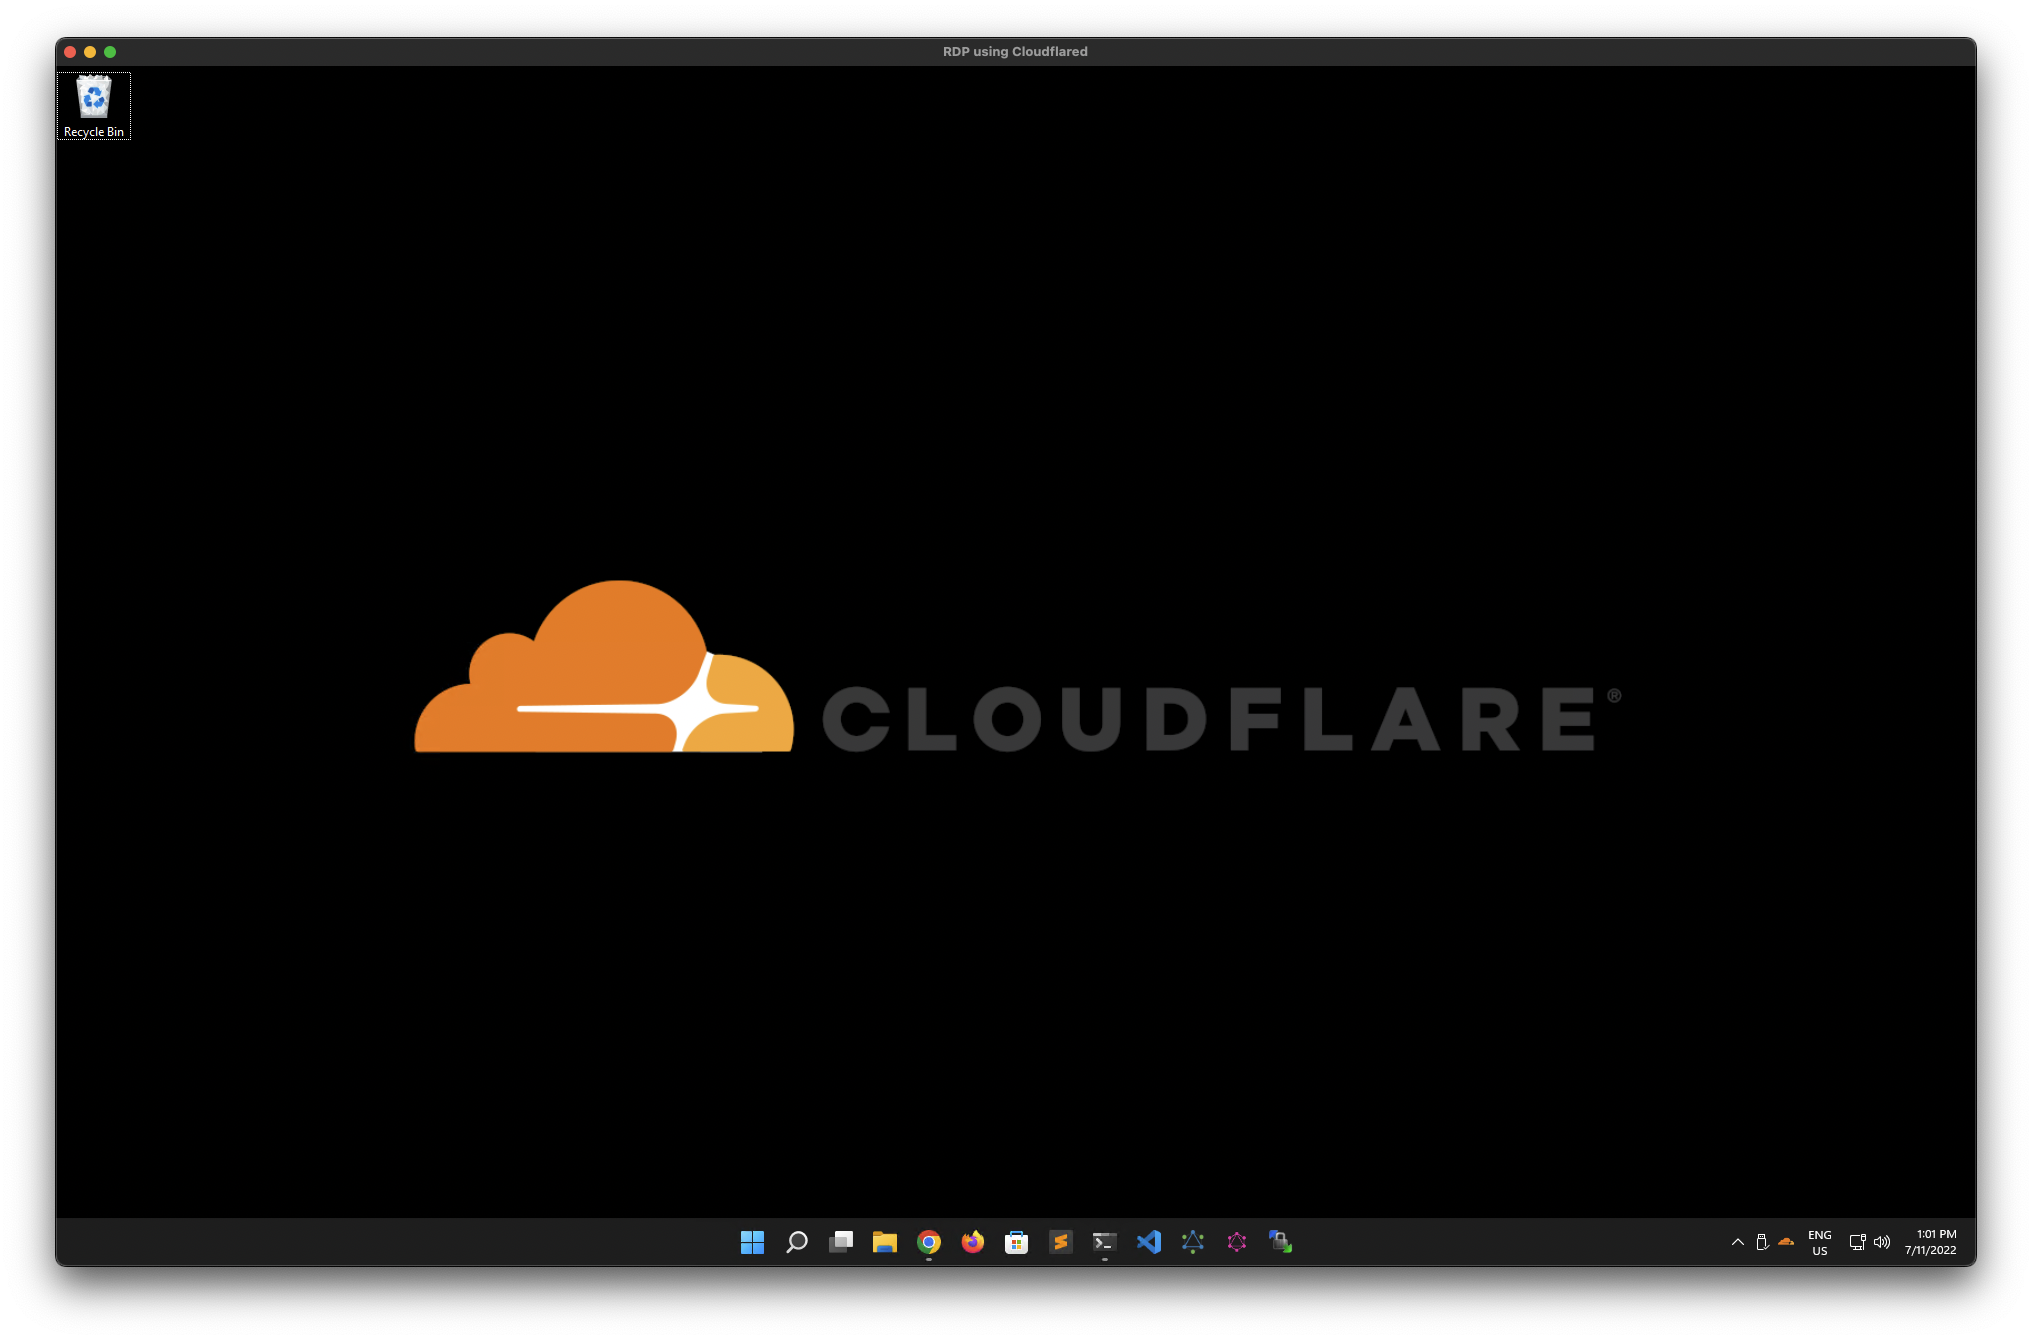
- Once you complete the authentication process, the RDP session will start as normal.
![image]()
 Once cloudflared is installed, you should see an active tunnel for your host in Zero Trust > Access > Tunnels as shown below.