This post will show you how to publish docker containers using Cloudflare Zero Trust.
- Optional - I recommend using Portainer. Instructions for installing on a standalone Docker host can be found here.
Note: Everything can be done using the docker CLI. This guide will assume you are using Portainer.
- Installation steps.
- Installation command
docker run -d -p 8000:8000 -p 9443:9443 --name portainer --restart=always -v /var/run/docker.sock:/var/run/docker.sock -v portainer_data:/data portainer/portainer-ce:latest - Login using
https://localhost:9443
- Installation command
-
Create a Cloudflare Tunnel using cloudflared. Navigate to dashboard > Account Home > Zero Trust > Access > Tunnels > Create a Tunnel.
-
Enter a descriptive name for the tunnel (docker in this case) and click Save tunnel.
-
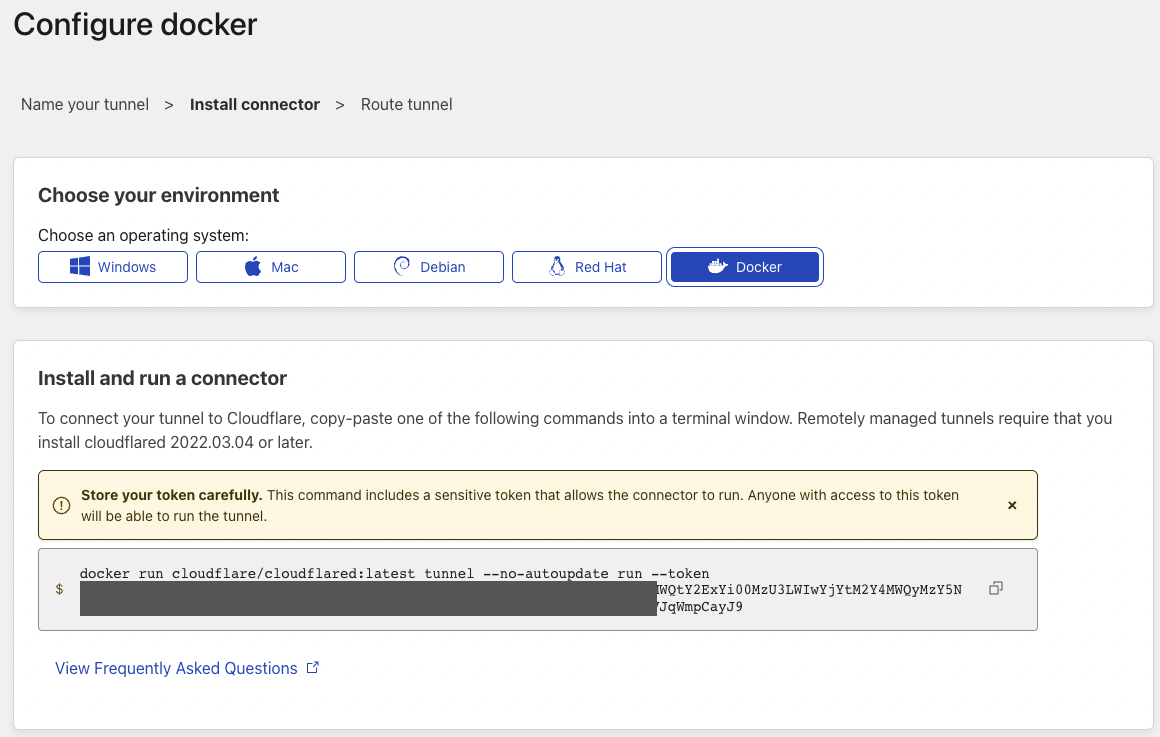
Select the target platform for cloudflared. In this case it will be Docker. Each target platform will have the cloudflared installation command listed.
![image]()
- Create a docker-compose.yaml for use in Portainer (Stacks). This configuration creates a container called demo-cloudflared running the cloudflared daemon in its own docker network demo-cloudflared. The container maintains the tunnel to Cloudflare.
1
2
3
4
5
6
7
8
9
10
11
12
13
14
 version: "3.7"

 services:
 cloudflared:
     image: cloudflare/cloudflared:latest
     container_name: demo-cloudflared
     restart: unless-stopped
     command: tunnel --no-autoupdate run --token eyJhIjoiNjM<redacted>
     networks:
     - demo-cloudflared

 networks:
 demo-cloudflared:
     name: demo-cloudflared
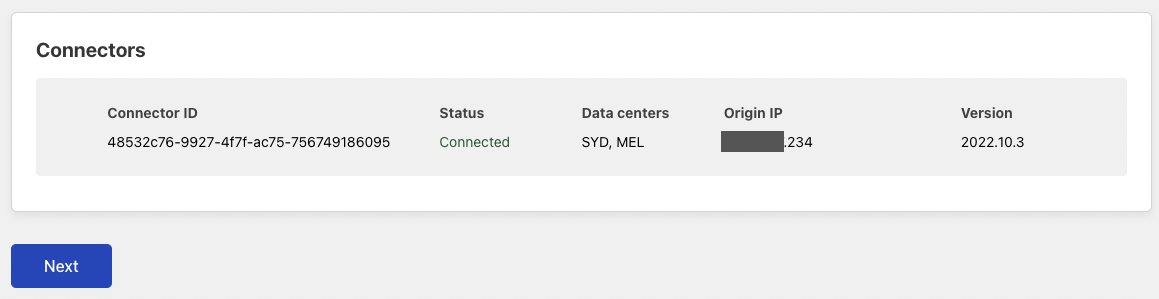
-
Once the Stack has been deployed, you will see the following section appear on the configuration page.
![image]()
- For this example, we’ll deploy and publish HTTPBin. This can be any service you are running in docker.
1
2
3
4
5
6
7
8
9
10
11
12
 version: "3.7"
 services:
 demo-httpbin:
     image: kennethreitz/httpbin
     container_name: demo-httpbin
     restart: unless-stopped
     networks:
     - demo-cloudflared

 networks:
     demo-cloudflared:
     external: true
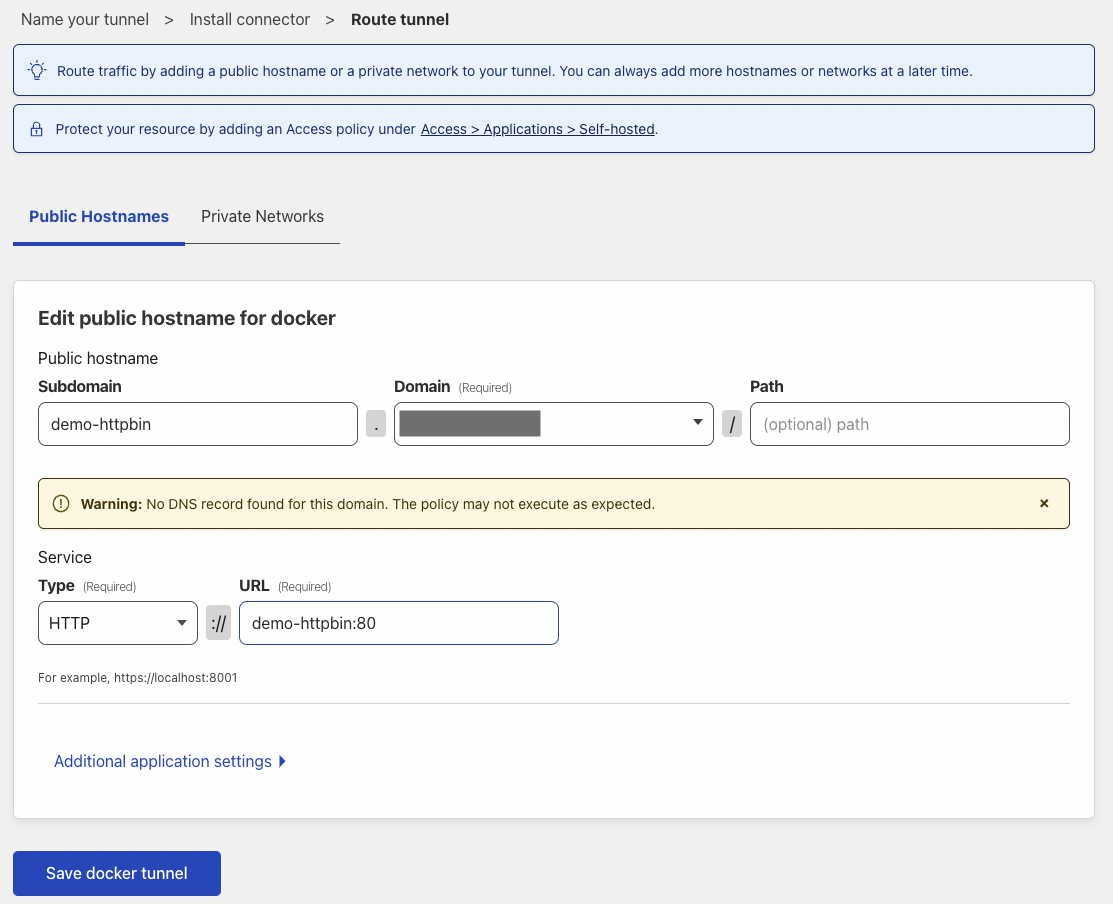
- Configure your desired Subdomain and Domain for the application. The Service Type and URL are the protocol and container name along with the port that the container listens on.
Note: Steps 11-14 can be completed before publishing the application through cloudflared. This is the recommended order as the application access policy will be in place before the application is published.
The application will be available on https://demo-http.yourdomain as soon as you click Save docker tunnel.
![image]()
-
The site is now accessible by going to https://demo-httpbin.yourdomain.
-
Create an Application by going to Zero Trust > Access > Applications > Add an application. Select Self-hosted.
![image]()
-
Configure the Access Policy as shown below.
![image]()
-
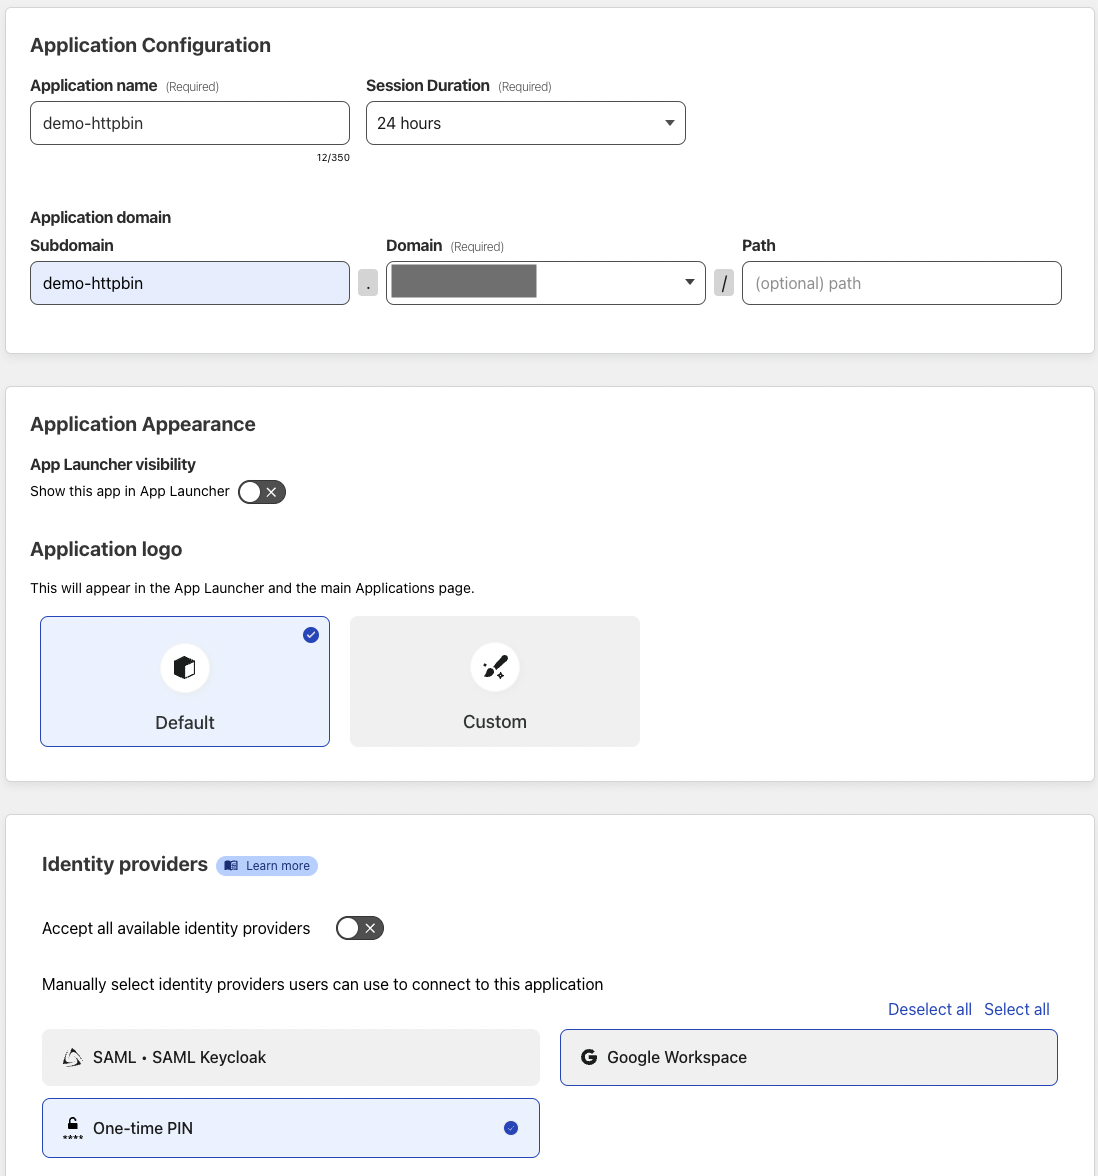
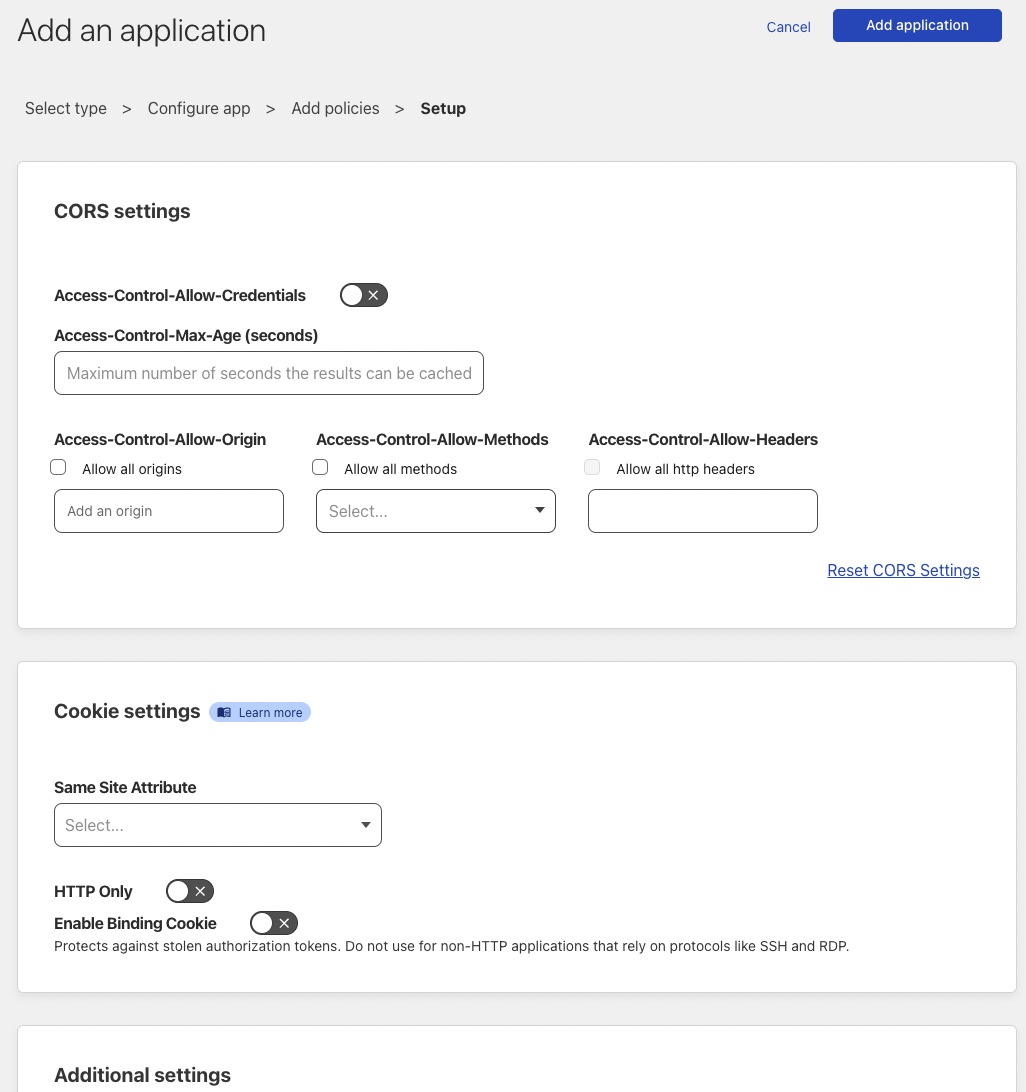
Configure application specific settings (none are required for this application). Click Add application.
![image]()
- Navigate to the application (https://demo-httpbin.yourdomain) and check the Access Policy.
![image]()