This post will show you how to publish a Squid proxy using Cloudflare Zero Trust Access and Cloudflare Tunnels. This allows you to access homelab resources from a broswer by setting a web proxy. By extension, it also allows you to broswe the Internet using your home Internet connection.
Normally on devices that you fully control, you would use a VPN to achieve the same outcome. However, when using corporate devices, you may not be able to use your own VPN software. This is a good alternative to provide secure access to your homelab resources. It also allows to you access region locked content when travelling for work.
This post assumes that you are familiar with docker.
Install Squid proxy using Docker.
- Install Squid using the docker-compose.yaml below. On the docker host create a directory for squid that will contain the squid.conf and passwords files.
Note: The port configuration is optional but useful for local testing of the proxy.
Note: The configuration below assumes that there is a cloudflared container called demo-cloudflared running in a network called demo-cloudflared. These steps are documented in the Cloudflare Zero Trust Access Section below.
1
2
3
4
5
6
7
8
9
10
11
12
13
14
15
16
17
 version: "3"
 services:
 proxy:
     image: datadog/squid:latest
     container_name: squid-proxy
     ports:
       - "3128:3128"
     volumes:
     - /path/to/docker/squid/squid.conf:/etc/squid/squid.conf
     - /path/to/docker/squid/passwords:/etc/squid/passwords
     restart: unless-stopped
     networks:
     - demo-cloudflared

 networks:
     demo-cloudflared:
     external: true
- Paste the following configuration into squid.conf. Add
acl Safe_ports port <port>oracl SSL_ports port <port>to allow applications that run on different ports.Note: Modify auth_param basic realm my-proxy-name if you would like to identify your proxy.
1
2
3
4
5
6
7
8
9
10
11
12
13
14
15
16
17
18
19
20
21
22
23
24
25
26
27
28
29
30
31
32
33
34
35
36
37
38
39
40
41
42
43
44
45
46
47
48
49
50
51
52
53
54
55
56
57
58
59
60
61
62
63
64
65
66
67
68
69
70
71
72
73
 acl localnet src 10.0.0.0/8	# RFC1918 possible internal network
 acl localnet src 172.16.0.0/12	# RFC1918 possible internal network
 acl localnet src 192.168.0.0/16	# RFC1918 possible internal network
 acl localnet src fc00::/7       # RFC 4193 local private network range
 acl localnet src fe80::/10      # RFC 4291 link-local (directly plugged) machines

 acl SSL_ports port 443
 acl Safe_ports port 80		# http
 acl Safe_ports port 21		# ftp
 acl Safe_ports port 443		# https
 acl Safe_ports port 70		# gopher
 acl Safe_ports port 210		# wais
 acl Safe_ports port 1025-65535	# unregistered ports
 acl Safe_ports port 280		# http-mgmt
 acl Safe_ports port 488		# gss-http
 acl Safe_ports port 591		# filemaker
 acl Safe_ports port 777		# multiling http
 acl SSL_ports port 8006		# Proxmox
 acl SSL_ports port 9443		# Portainer
 acl Safe_ports port 81		# Nginx Proxy Manager
 acl SSL_ports port 9090		# Cockpit
 acl CONNECT method CONNECT

 auth_param basic program /usr/lib/squid/basic_ncsa_auth /etc/squid/passwords
 auth_param basic realm my-proxy-name
 acl authenticated proxy_auth REQUIRED

 http_access deny !Safe_ports

 # Deny CONNECT to other than secure SSL ports
 http_access deny CONNECT !SSL_ports

 # Only allow cachemgr access from localhost
 http_access allow all manager
 http_access deny manager

 # We strongly recommend the following be uncommented to protect innocent
 # web applications running on the proxy server who think the only
 # one who can access services on "localhost" is a local user
 http_access deny to_localhost

 #
 # INSERT YOUR OWN RULE(S) HERE TO ALLOW ACCESS FROM YOUR CLIENTS
 #

 # And finally deny all other access to this proxy
 http_access allow authenticated

 # Squid normally listens to port 3128
 http_port 3128


 # Uncomment and adjust the following to add a disk cache directory.
 cache_dir null /tmp

 #Default:
 # access_log daemon:/var/log/squid/access.log squid
 access_log none

 # cache_log /var/log/squid/cache.log
 cache_log /dev/null


 # Leave coredumps in the first cache dir
 coredump_dir /var/spool/squid

 # store_id_bypass on
 cache deny all
 refresh_pattern ^ftp:		1440	20%	10080
 refresh_pattern ^gopher:	1440	0%	1440
 refresh_pattern -i (/cgi-bin/|\?) 0	0%	0
 refresh_pattern (Release|Packages(.gz)*)$      0       20%     2880
 refresh_pattern .		0	20%	4320
-
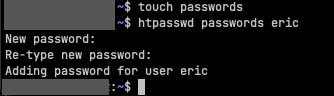
Configure the passwords file with the credentials that will be used by Squid. You do this using the
htpasswdcommand. Navigate to the directory created during Step 1. Create a file called passwords by runningtouch passwords. In the same directory run the commandhtpasswd passwords ericto create a user and password. The output is shown below.![image]()
-
Verify that the proxy is running using Firefox. If you set ports in Step 1, you can access the proxy using <dockerhost>:3128. If it is working correctly, Firefox will prompt you to authenticate to the proxy as shown below.
![image]()

Publish Squid proxy using Cloudflare Zero Trust Access
- Create a docker-compose.yaml for use in Portainer (Stacks). This configuration creates a container called demo-cloudflared running the cloudflared daemon in its own docker network demo-cloudflared. The container maintains the tunnel to Cloudflare.
1
2
3
4
5
6
7
8
9
10
11
12
13
14
 version: "3.7"

 services:
 cloudflared:
     image: cloudflare/cloudflared:latest
     container_name: demo-cloudflared
     restart: unless-stopped
     command: tunnel --no-autoupdate run --token eyJhIjoiNjM<redacted>
     networks:
     - demo-cloudflared

 networks:
 demo-cloudflared:
     name: demo-cloudflared
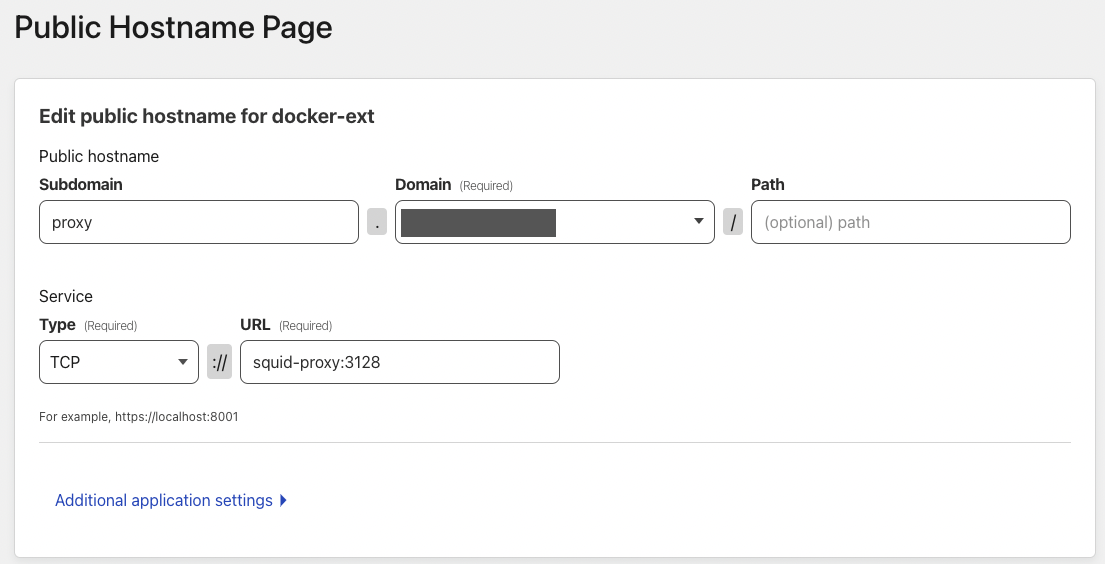
- Create the public hostname. Navigate to Zero Trust > Access > Tunnels > Your Tunnel > Public Hostname. Enter a suitable Subdomain for the proxy host and select your Domain. Type will be TCP and the URL will be squid-proxy:3128.
Note: The URL will be the container_name specified in Step 1 at the very top of this guide.
![image]()
-
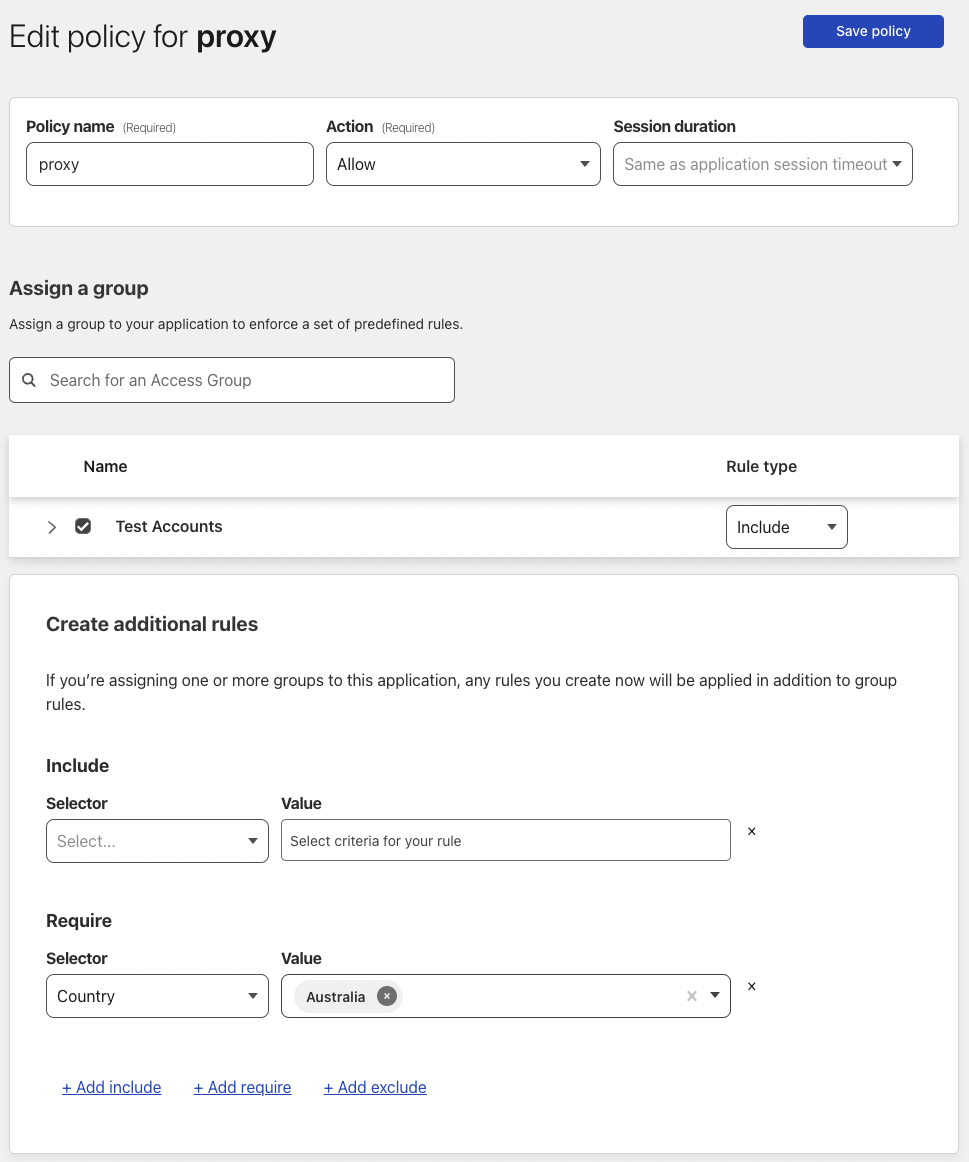
Add an application policy. Navigate to Zero Trust > Access > Applications > Add an application. Give the policy a suitable name and assign users using the Include selector. Optional - you can choose to add appropriate Require fields. In this example, only connections from Australia will be allowed.
![image]()
-
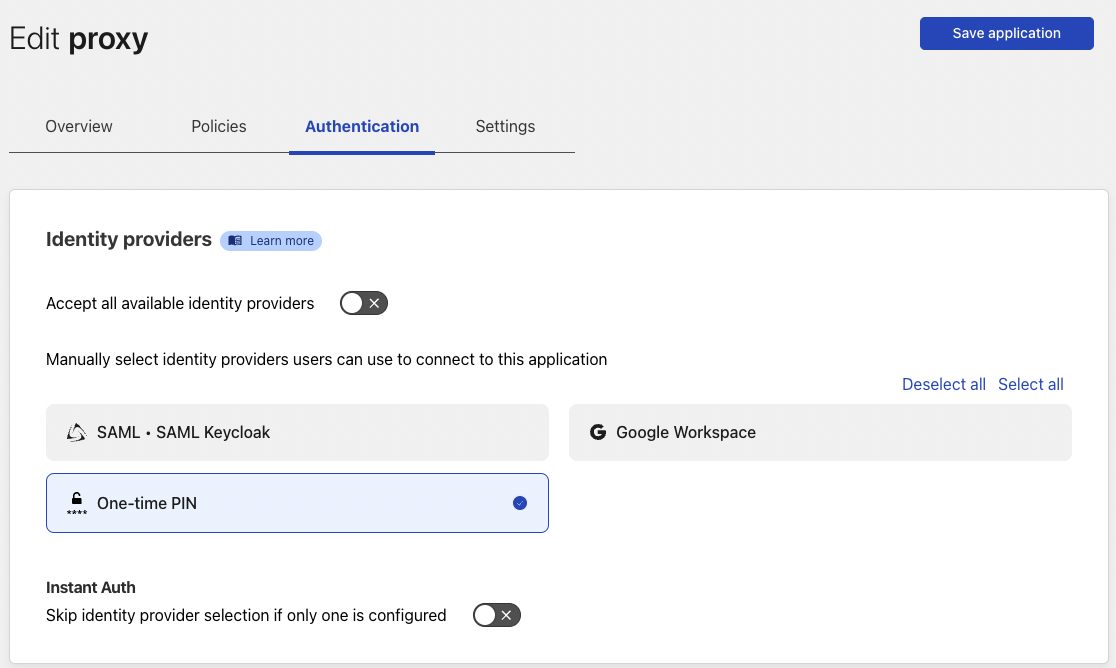
Configure authentication using your preferred/configured options. In this case, One-time PIN will be used.
![image]()
-
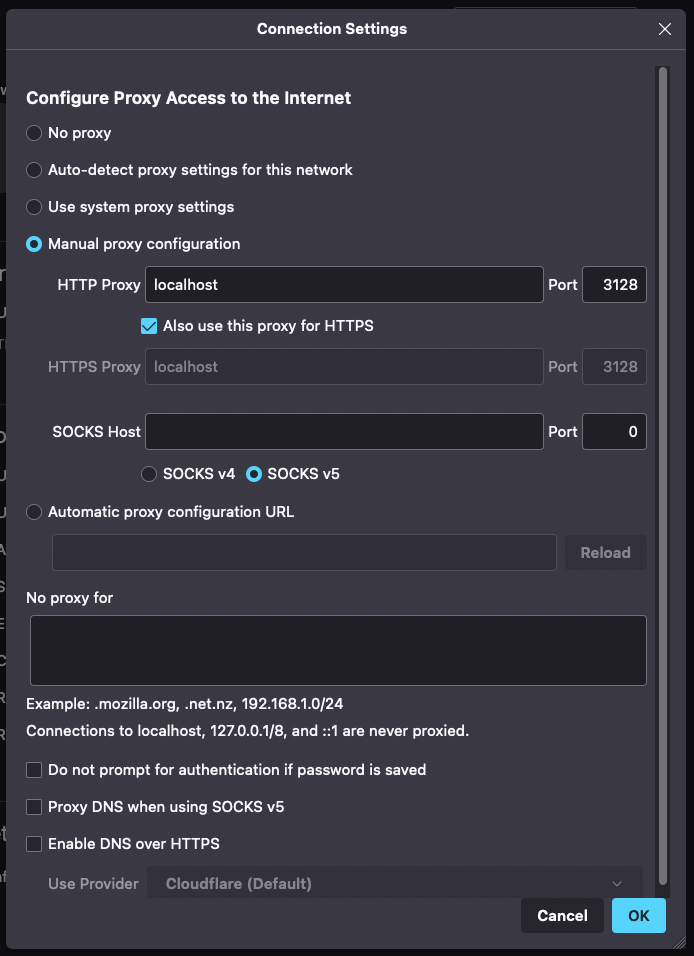
Configure Firefox to use the Squid proxy. Go to Settings and search for proxy.
![image]()
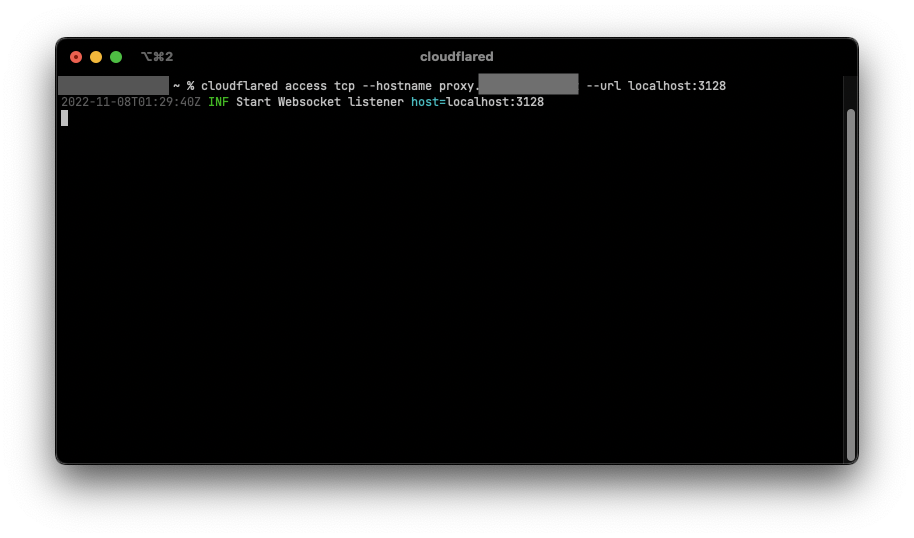
- Start cloudflared on the client computer using the command
cloudflared access tcp --hostname proxy.yourdomain --url localhost:3128. If cloudflared is not installed, follow these instructions install cloudflared.Note: Cloudflared will need to be running in order to connect to the proxy.
![image]()
-
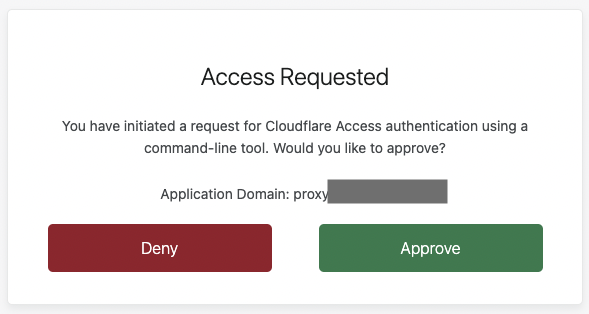
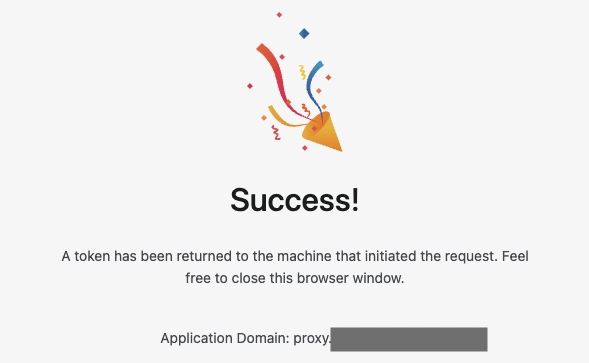
Once Firefox is opened, you should see a browser window open requesting that you login to Cloudflare Access. Login using your account specified in Step 4. Once authenticated, you will be prompted to Approve or Deny access. Select Approve.
![image]()
![image]()
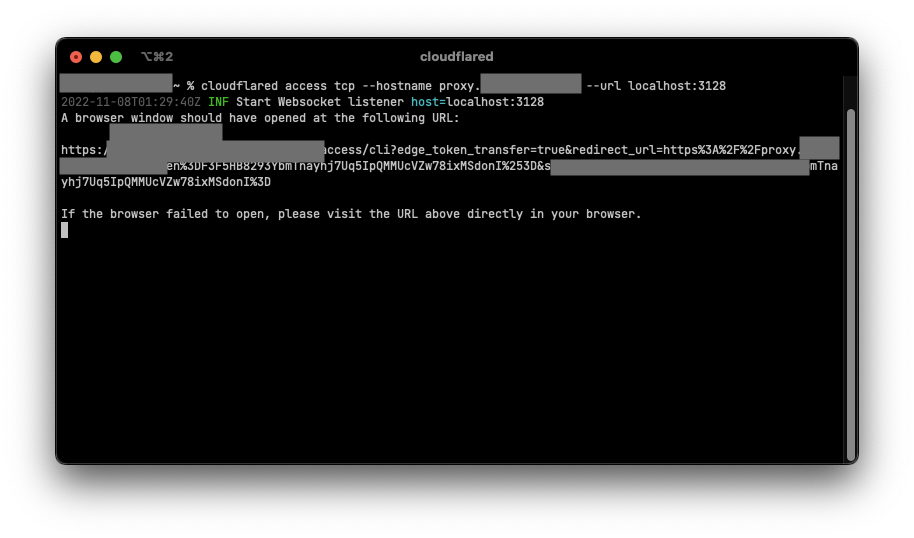
Note: If a broswer window does not open automatically you can click or copy and paste the URL from console.
![image]()
- Everything is complete, you should be able to access the Internet and homelab resources from any network.