This post will show you how to install and configure Cloudflare Wrangler on Windows and Linux.
Wrangler Github
The latest release of Cloudflare Wrangler can be found at: Wrangler Github.
Windows
Wrangler is installed using npm. For Microsoft Windows, you will need to download and install Node.js.
-
Download and install Node.js from https://nodejs.org/en/download/current/. Ensure Add to PATH is selected under Custom Setup.
![image]()
-
You should now have npm available as a command in terminal.
![image]()
-
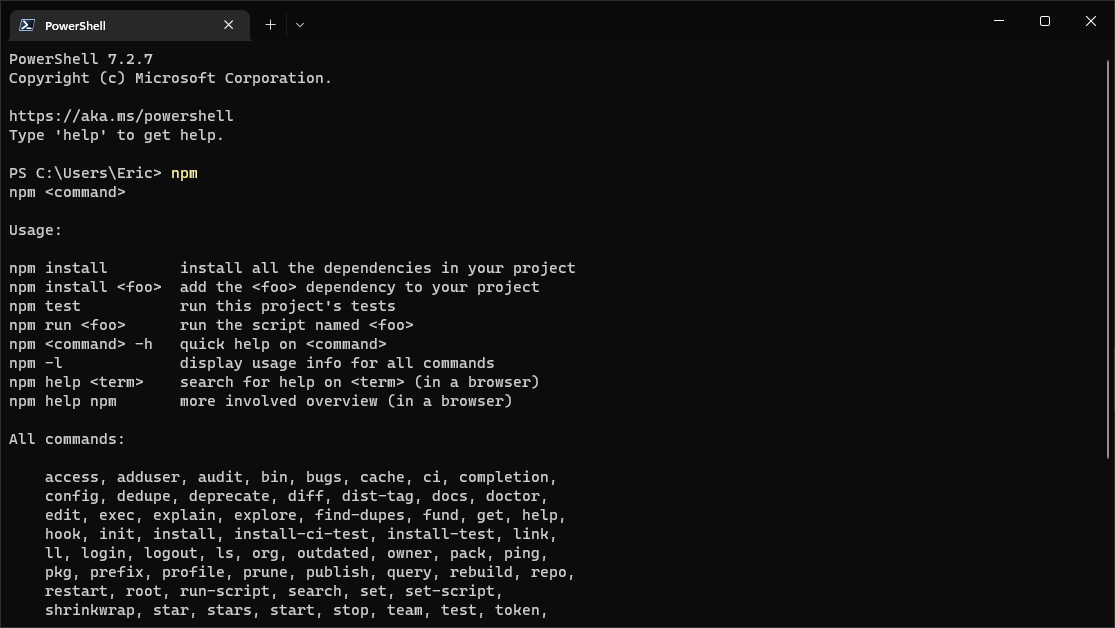
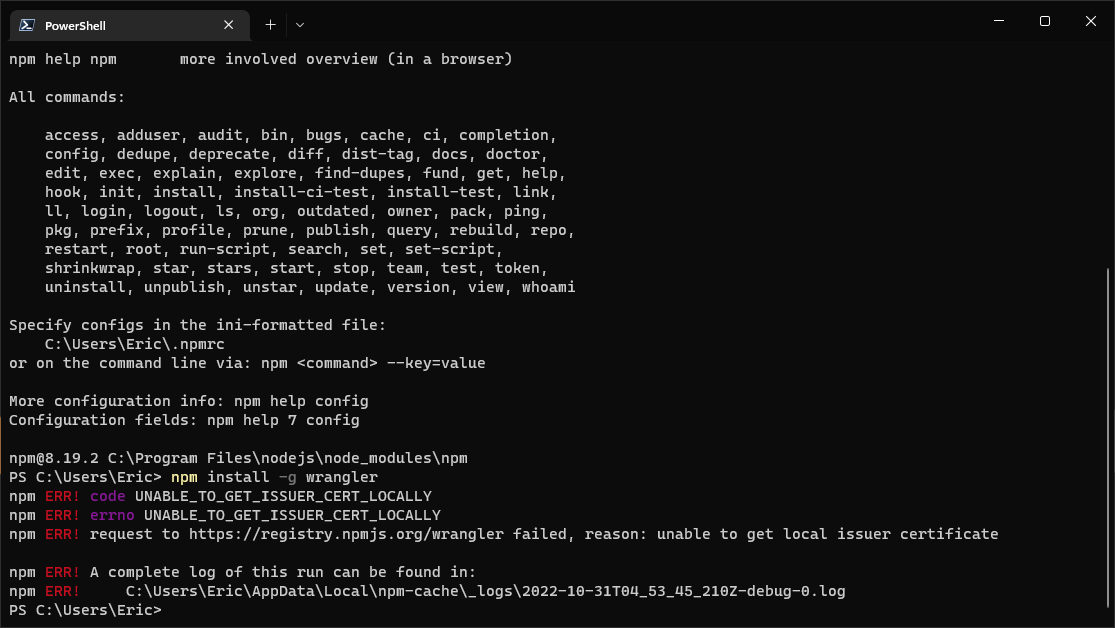
Install wrangler using
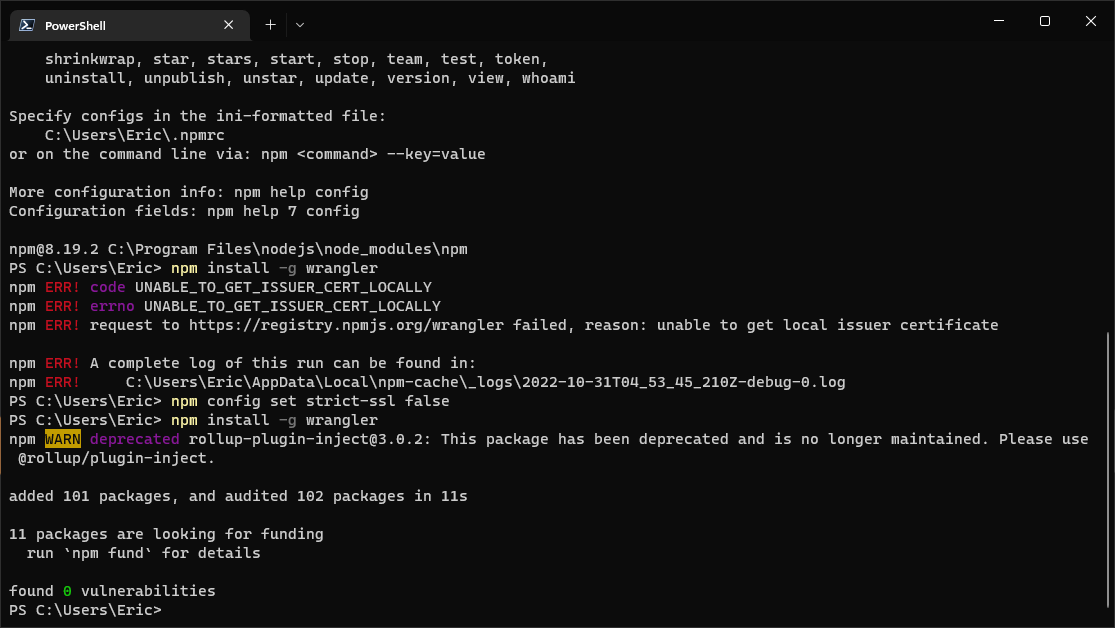
npm install -g wrangler. You may see the error message npm ERR! code UNABLE_TO_GET_ISSUER_CERT_LOCALLY as shown below. If not, move on to step 7.![image]()
-
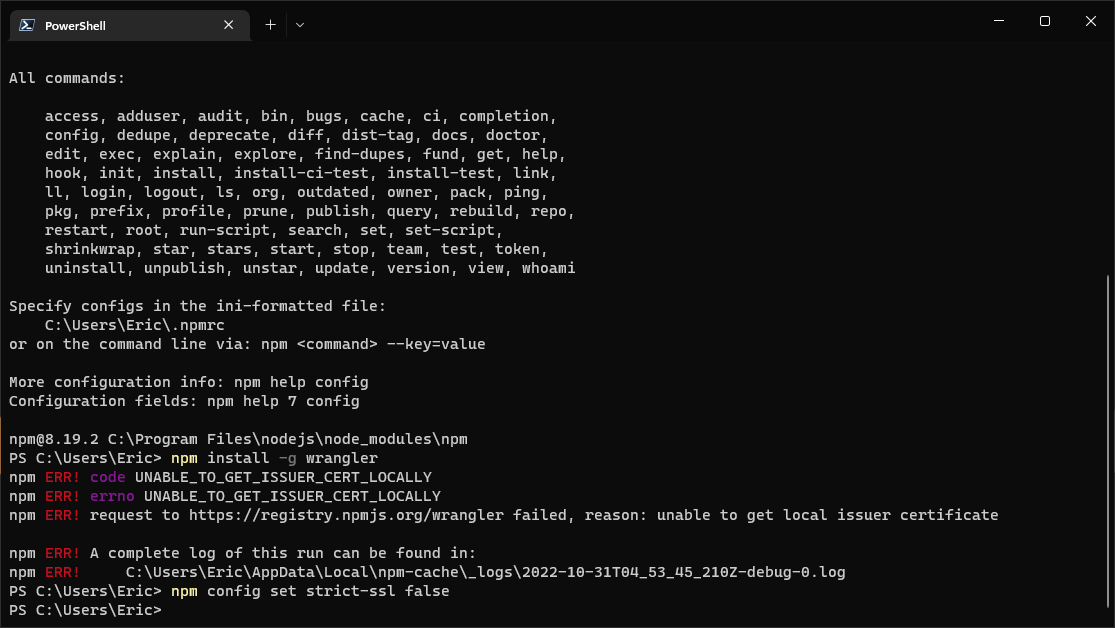
If you encountered the error below, run the following command.
npm config set strict-ssl false![image]()
-
Run the wrangler installation command again
npm install -g wrangler. This time it should complete successfully.![image]()
-
Enable strict-ssl again using
npm config set strict-ssl true. -
Check the installed wrangler version using
wrangler --version.![image]()
-
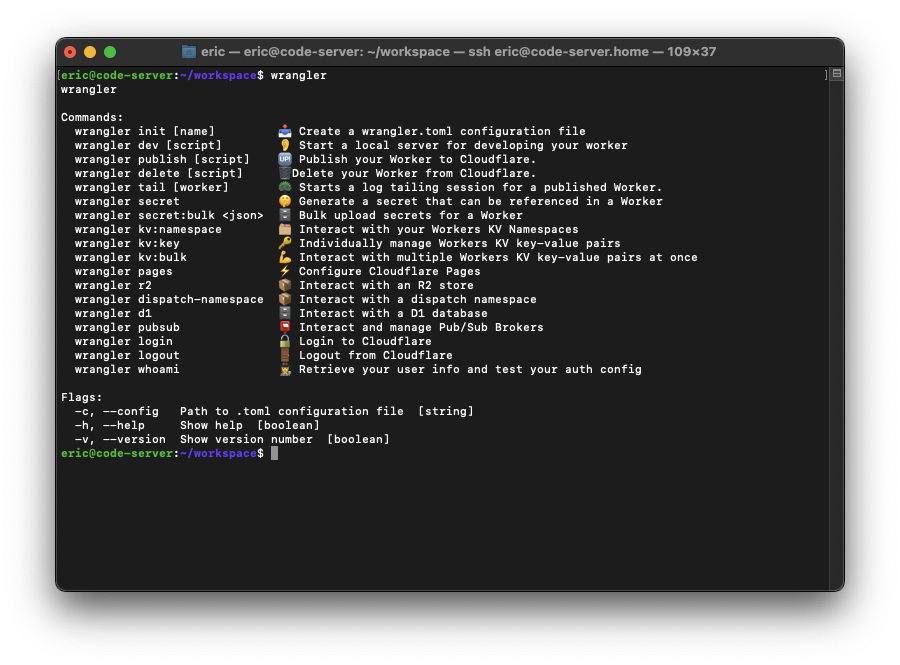
Review the available commands in wrangler by running
wrangler.![image]()
-
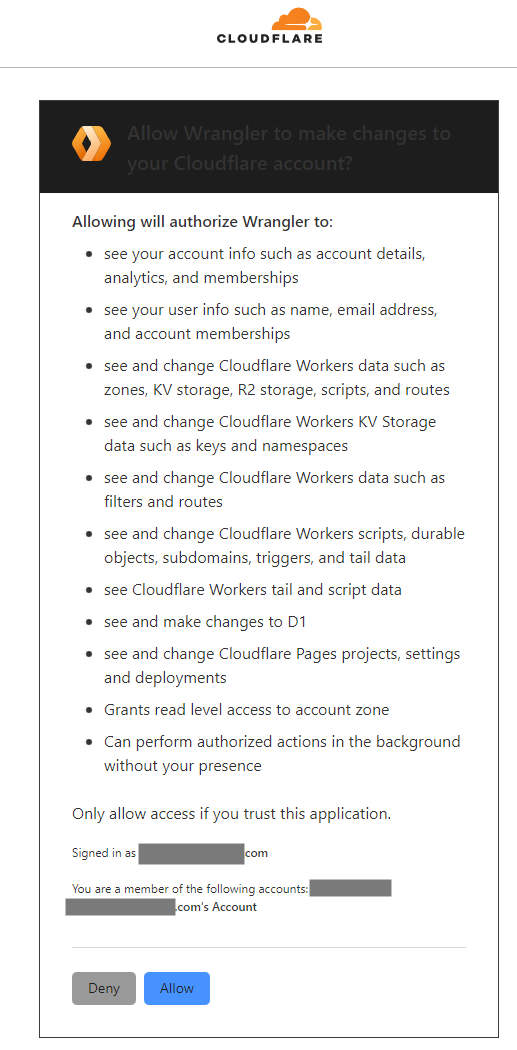
Authorise wrangler with your Cloudflare account using
wrangler login.![image]()
![image]()
![image]()
-
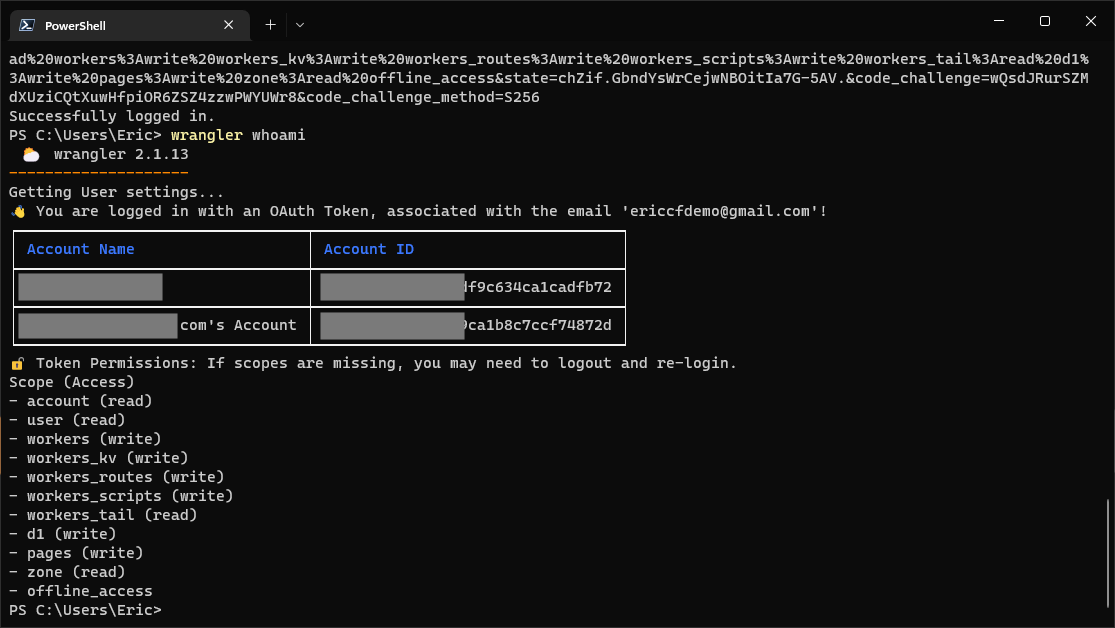
Check that wrangler in with the expected account and permissions
wrangler whoami.![image]()


Linux
Note: Steps 7-10 are identical to the Microsoft Windows configuration.
-
Install NPM. Follow your distribution specific instructions. I would suggest using NVM.
-
Install Wrangler
npm install -g wrangler -
Check the installed wrangler version using
wrangler --version. -
Review the available commands in wrangler by running
wrangler.![image]()
-
Authorise wrangler with your Cloudflare account using
wrangler login. -
Check that wrangler in with the expected account and permissions
wrangler whoami.